Required User Level
1 - View
The minimum user access level a user must have
to use this feature of Pimarc.
The Files section is used to attach digital files to the project. These files could be pictures,
notes, letters, agreements, any sort of digital file. The file can be attached rwo ways. The
first is to simply drag and drop the file onto the big folder image in the middle of the of the
Files page. The other way is to click on the empty space on either side of the big folder image,
this will open a file select window. Navigate to the folder that contains the file or files that
you want to attach, high light it / them and click on the Open button. The files will be added
to the attached file list.
There are a number of ways to identify / define the type of file that is being attached. The
first option that is available is setting if the file is field notes or some other type of file.
If the file is marked as Field Notes there is another associated setting called SRI. This setting
is currently only relevant in Ontario is determines if the Field Note file is available for sale on
the Survey Record Index website. In the graphic below the field note example is available on the
SRI site.
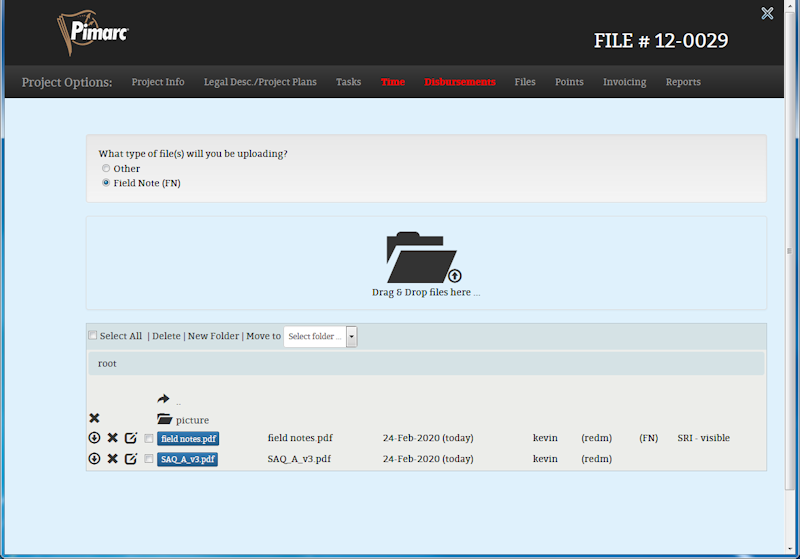
The next section on the files page is used to manage the list. I allows you to select multple files,
delete files, create folders to aid in organization of the files and the option to move files between
folders. The graphic below shows that there are two folders for file placement. The default folder
that is available for all projects is called root and I created a folder called "picture". Use
the check boxes to select which files you want to manage and then select Delete or select the folder
to move them to.
The row under the file management options displays the path to the currently selected folder.
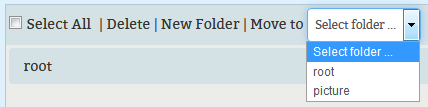
There are a number of ways to navigate around the folders created in the files section. The
folder names in the displayed path are also links to those locations. So in the graphic below
"picture" is the folder that is currently being displayed. So you can see all the sub-folders and
files in the folder picture. Root is a link to the parent folder, so click on root and the
page will refresh to display the root folder.

In the actual file and folder list the  icon is a link that
will take you from the current folder list to the parent folder of the current list. The
icon is a link that
will take you from the current folder list to the parent folder of the current list. The
 icon is used to indicate that the link is to a sub-folder
for example a folder called "picture".
icon is used to indicate that the link is to a sub-folder
for example a folder called "picture".
Other icons in the file display area are  which
is used to download the file from the server.
which
is used to download the file from the server.
The  icon is used to delete the file or folder
from the server. If the item to be deleted is a folder be warned that if there are files or sub-folders
in the folder to be deleted, the files and sub-folders will be deleted as well.
icon is used to delete the file or folder
from the server. If the item to be deleted is a folder be warned that if there are files or sub-folders
in the folder to be deleted, the files and sub-folders will be deleted as well.
The  icon is used to open the edit file window.
The button with the file name is so you can open / view the attached digital file.
The next column of information is for the file description. By default, when a file is added to the
system, this field is filled with the file name. It can be changed at any time.
The next column in the file list will show the date that the file was added to the file list.
(Note:
See the graphic below
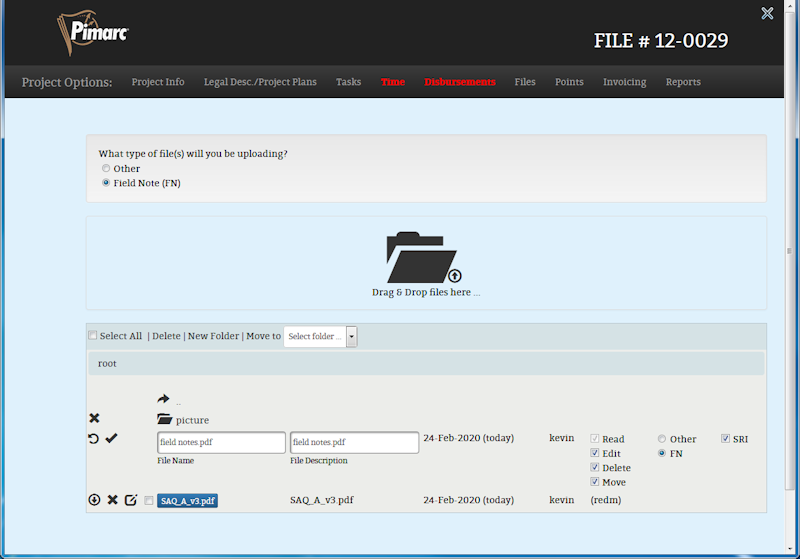
In the edit window you can change the fle description and the file name that is displayed in Pimarc.net
(Note: changing the file name field will not change the actual digital file name, that is stored
some place else).
You can also change the file attribules. These control if changes can be made to the file record
specifically if it can be changed, deleted or moved.
You can also change if the file is a field note or not.
And the last setting which currently is only relavent to Ontario companies is the SRI setting. If
the file is marked as a field note there is the possiblility that the check box can be checked.
if there is a check mark in the check box then when the file is added to the system or updated
it will be sent to the SRI server and will be available for purchase from that site.
Once the changes to the file record have been completed you click on the  icon to save the changes that were made or click on the
  icon
to cancel the changes to the file record.
icon
to cancel the changes to the file record.