Required User Level
1 - View
The minimum user access level a user must have
to use this feature of Pimarc.
This section shows all tasks for the project. You can add tasks to the project and also it allows
managers to assign tasks to other individuals. This function is available for Level 2 users and
up. An example of this feature is to let the title searcher know when to register a plan. Once
the task is assigned to an individual it appears in that individual's assigned task list.
The graphic below shows a single task and some of the information related to that task. The first
line shows the billing code and deartment, the date range in which the task must be completed,
the person who assigned the task and the current percentage of the teask that has been completed.
The icon  on the left indicates that the
work is ongoing. However when the icon is clicked it will change to the
on the left indicates that the
work is ongoing. However when the icon is clicked it will change to the  icon which indicates that the task has been completed. By clicking on the "More details +" link
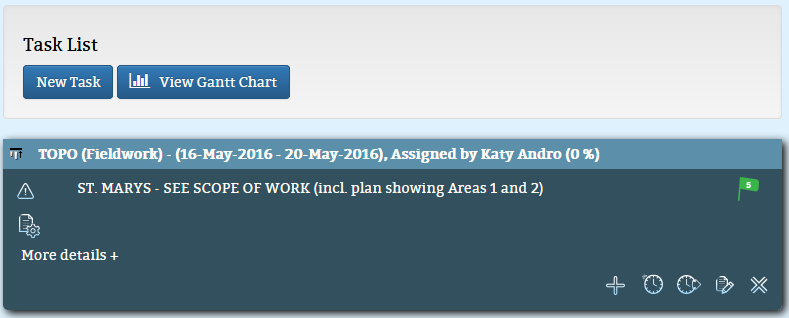
you will be shown more detailed information about the task. See below.
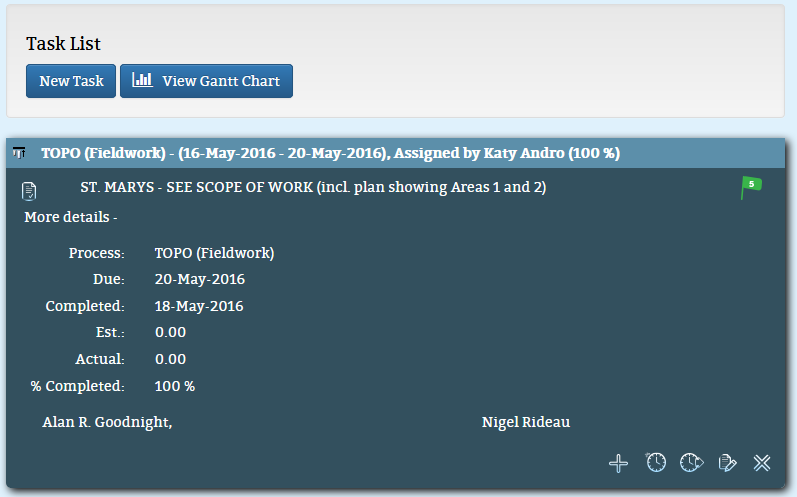
The icons in the bottom right of the task window give the user different options.
 is used to insert a new task above the current task.
 is used to add time and associate it to this task.
 is used to add time but it will not be associated to this task.
 is used to edit this task.
 is used to delete this task.
The last icon in the task window is  and this
indicates the priority of this task compared to other tasks. In this instance this task is set to
5. The priority range is 1 through 9 plus the option to set the priority to Hold in the case there
is a delay for some reason.
and this
indicates the priority of this task compared to other tasks. In this instance this task is set to
5. The priority range is 1 through 9 plus the option to set the priority to Hold in the case there
is a delay for some reason.
When there are multiple tasks to be performed for a project you have a couple of options for
organizing them. The first and most direct option is to look for the  icon at the beginning of the first line of each task. You can use this to drag the individual
tasks to the order you want them in.
icon at the beginning of the first line of each task. You can use this to drag the individual
tasks to the order you want them in.
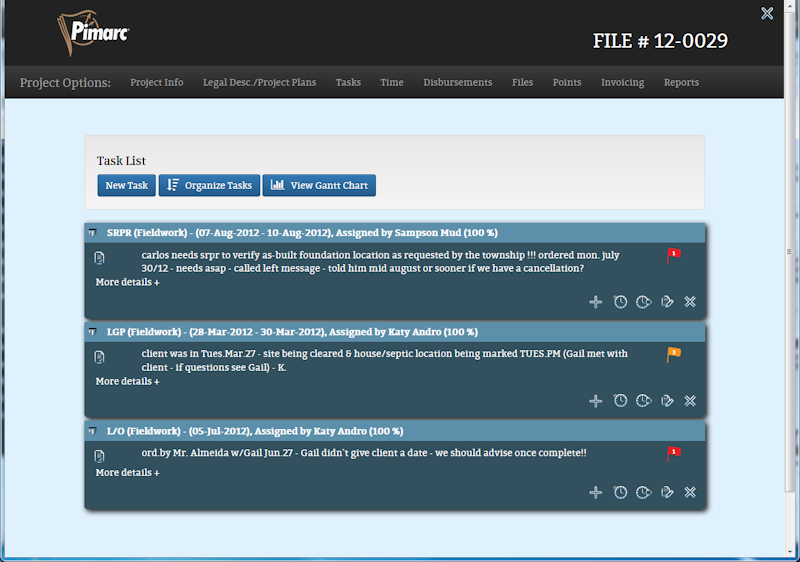
When there are multiple tasks a button will appear to "Organize Tasks". Click it and the Task list
will change to a single line of text for each task and you will be able to drag each line to where
it should be in your list. When you are done moving the tasks around just click on the Task
option in the menu.

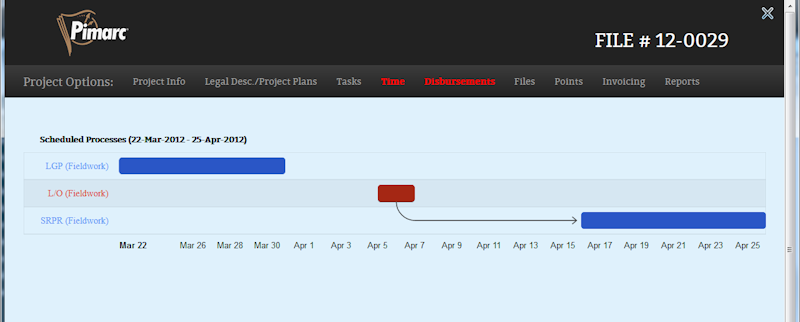
The last button that is available on the Task page is the "View Gantt Chart" button. Clicking this
button will change the task list page to a Gantt chart showing all the tasks for the project with
their relative positions along a time line. The tasks will be ordered according to their
respective start dates. Earliest start dates at the top of the chart, last start dates at the bottom of the
chart. This chart will also display any task dependencies if there are any as a line and arrow joining the
task boxes. Details of each task can be seen as a popup when the mouse cursor goes over each task box.