Required User Level
1 - View
The minimum user access level a user must have
to use this feature of Pimarc.
Below the legal description information is the associated plan section. Click on the "New Plan"
button to open the add project plan window. This is where you can attach digital copies of the
plan(s) that were produced by this project. Once again the region that the project is located
in will have an effect on the information that will be displayed and can be recorded. As an
example the Association of Ontario Land Surveyors has a plan numbering system that requires a
unique number be assigned to registered plans. Below is the template that allows the AOLS
information to be recorded.
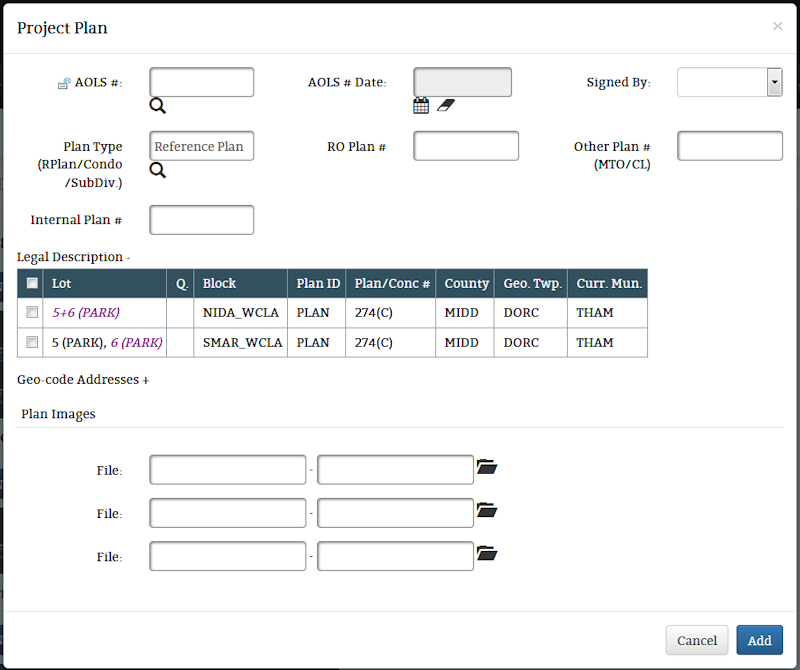
For other regions the recorded plan information is more limited.

As you can see the legal description information is shown on this page, this allows users to associate
plans to specific legal description records, one, some or all the records can be associated.
The Geo-code Addresses section is closed by default but it can be openned by clicking anywhere on the
Geo-code Addresses label.
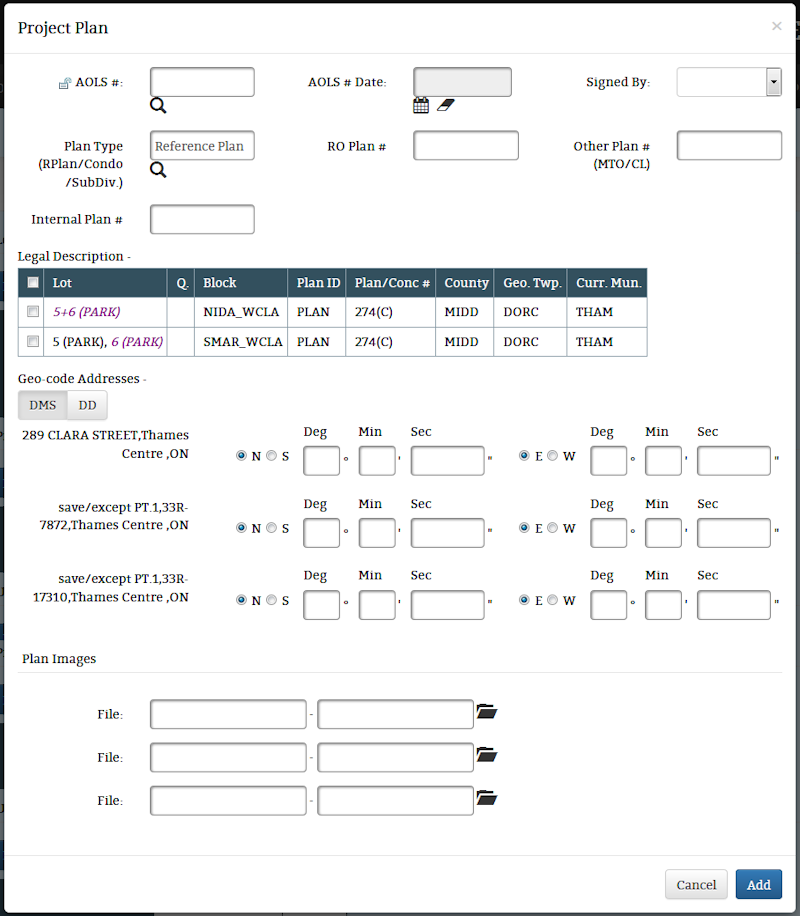
When the Geo-code Addresses section is openned it allow the user to manually enter a geographic
co-ordinate for each street address field that has been filled in the project data page.
The co-ordinate information can be entered in one of two different formats, either degrees, minutes
and seconds (DMS) or decimal degrees (DD).
The Plan Images section is where the digital plans are actually attached to the project. The
text boxes record information about the attached files. The first text box automatically fills with
the file name and the second can be manually filled with any relavent information. Click on the
folder icon  to select a file to attach to the project.
Once all the information has been entered for the attached plan image just click on the Add button
at the bottom of the form.